INSIGHTS
11 min read


Published on 06/06/2023
Last updated on 04/11/2024
KubeClarity: Vulnerability scanning
Share

In the previous installment of this ongoing KubeClarity blog series, we delved into the concept of Multi SBOM Integration, which enables a thorough understanding of component pedigrees, versions, and suppliers. This post will focus on KubeClarity vulnerability scanning integration with the generated SBOMs to generate detailed insights into vulnerabilities that affect your deployments and how to handle them.
Let’s explore more on vulnerability scanning—and the key vulnerability scanning tools you can use to get more control over your security threats.

Before we delve into the topic, you can get up to speed on SBOM and how SBOMs serve as vital inputs to vulnerability scanners that lead you to insightful cyber security risk management reports.
KubeClarity offers a conventional approach for integrating vulnerability scanners like other solutions and additionally provides an advanced capability for multi-scanner integration. Additionally, it would be beneficial to quickly recap the architecture and the two-phased approach to generating an SBOM, which involves scanning and creating a vulnerability graph, before we proceed further.
Assuming you have a solid grasp of the SBOM (Software Bill of Materials) integration process, let's focus on the second phase of conducting vulnerability scanning, as seen in Figure-2 below. In this blog post, we will delve into the nuances of this phase and share valuable insights on how to effectively address vulnerabilities by implementing known fixes. The post will also cover the single-scanner and multi-scanner integration options as a hands-on exercise.

Vulnerability scanning with a multi scanner architecture
KubeClarity's vulnerability scanning utilizes a flexible infrastructure that enables multiple scanners' configuration and simultaneous operation. Like the pluggable nature of SBOM content analyzers that we visited in the previous post on multi SBOM integration, scanners in KubeClarity are designed to work in parallel, following the same model.
In Figure-3 below, you can observe the vulnerability scanning farm, which receives incoming SBOMs and preprocesses them to conform to the specific formatting requirements of each individual scanner. It's important to note that each scanner may have different types and unique formatting expectations. The scanners analyze the incoming data and generate vulnerability outputs in their native formats.

The remarkable aspect of KubeClarity lies in its ability to merge vulnerabilities reported by different scanners, harmonizing them into a consistently formatted and calibrated vulnerability report that includes severity levels, sources, and available fixes. These reports serve as valuable outputs, allowing users to filter and focus on specific areas of vulnerabilities for further investigation and resolution.
Source code
Feel free to explore the code related to vulnerability scanner integration, as most of it is available within the shared package. Take your time to examine and delve into it to better understand the implementation details. Figure-4 below offers a comprehensive overview of the code, providing a quick glance at its structure and components.

Integrating vulnerability scanning tools: Hands-on exercises
KubeClarity offers two vulnerability scanning approaches: the user interface (UI) and the command-line interface (CLI). Let's dive into both options starting with the UI first.
Option 1: Vulnerability scanning with the UI
To begin using the KubeClarity user interface, follow a few steps. Follow the installation instructions outlined in these blog posts to deploy KubeClarity within your Kubernetes cluster or local docker environment.
Once you have successfully deployed KubeClarity, it's time to access the user interface. The blog post provides detailed instructions on how to do this, so refer to it. Once in the UI, you can initiate a scan by following the guidelines. Again, look at the installation blog for a more comprehensive guide on the installation process and how to start a scan.
You can also run KubeClarity locally using Docker or Kind Clusters and populate it with synthetic data. This option allows you to explore the vulnerabilities and familiarize yourself with the basic structure of the vulnerability reporting system. Whether you use synthetic data or not, KubeClarity provides the same level of detail in its reports so that either option will provide valuable insights.
KubeClarity will perform the vulnerability scan based on the specified parameters, leveraging its extensive vulnerability database to identify potential risks. Let’s check out the vulnerability scan reports once the scan is completed.
Figure-5 below presents a vulnerability view, showcasing key details such as the vulnerability names, severity, the package of origin, available fixes, and attribution to the scanner that reported the vulnerability. You can take your time to thoroughly explore the vulnerabilities and familiarize yourself with their characteristics. As a next step, you can click on any of these fields to access more in-depth information and delve into the next level of detail.

Figure-6, displayed below, is an illustrative example of the screen appearing when you click on a "vulnerability name" item from the abovementioned list. This view provides detailed information and a deeper understanding of the selected vulnerability. Take a moment to explore the rich insights presented in this detailed view. Observe the “CVSS” tab in this view, to the right of “vulnerability details”, let’s get ready to click that next.

Figure-7 below shows a detailed view of CVSS scores and other valuable details reported from the scanning process.

Next, navigate back to the vulnerabilities view and explore filtering options as shown in Figure- 8. Filtering helps focus your vulnerability tracking efforts to reduce noise and improve efficiency in identifying and potentially fixing crucial vulnerabilities.

Next, Figure-9 showcases the dashboard view, where you can gain insights into vulnerability trends and act on fixable vulnerabilities. The ultimate objective of the entire vulnerability scanning process is to achieve a clear understanding of your most critical and relevant vulnerabilities, addressing them promptly. Through the KubeClarity user interface, you can appreciate how this process becomes meaningful and invaluable. There are numerous additional options and features to explore, which I encourage you to discover on your own. Explore away!

Option 2: Vulnerability scanning via the CLI
Step 1
Installing KubeClarity CLI: Install the KubeClarity CLI tool. Refer to the KubeClarity documentation on the GitHub repository for instructions on installing the CLI.
Step 2
Running a Vulnerability Scan: Using the KubeClarity CLI, you can scan vulnerabilities by running the appropriate commands. The CLI provides flexibility and automation capabilities for integrating vulnerability scanning into your existing workflows or CI/CD pipelines. The tool allows scanning an image, directory, file, or a previously generated SBOM.
Here is an example CLI command to initiate a vulnerability scan:
Usage
kubeclarity-cli scan <image/sbom/directory/file name> --input-type <sbom|dir|file|image(default)> -f </mark>Example scan
kubeclarity-cli scan nginx.sbom --input-type sbom</mark>Example output
<span class="hljs-attribute">INFO</span>[<span class="hljs-number">0000</span>] DependencyTrack config: {<span class="hljs-string">"host"</span>:<span class="hljs-string">"dependency-track-apiserver.dependency-track"</span>,<span class="hljs-string">"project-name"</span>:<span class="hljs-string">""</span>,<span class="hljs-string">"project-version"</span>:<span class="hljs-string">""</span>,<span class="hljs-string">"should-delete-project"</span>:true,<span class="hljs-string">"disable-tls"</span>:false,<span class="hljs-string">"insecure-skip-verify"</span>:true,<span class="hljs-string">"fetch-vulnerabilities-retry-count"</span>:<span class="hljs-number">5</span>,<span class="hljs-string">"fetch-vulnerabilities-retry-sleep"</span>:<span class="hljs-number">30000000000</span>} app=kubeclarityINFO[<span class="hljs-number">0000</span>] Loading DB. update=true app=kubeclarity mode=local scanner=grypeINFO[<span class="hljs-number">0000</span>] Creating Project. name=<span class="hljs-number">9</span>be05e7f-<span class="hljs-number">511</span>f-<span class="hljs-number">4</span>dfa-b418-ac49860fe42f, version=<span class="hljs-number">13</span>b4f9b3-<span class="hljs-number">95</span>ef-<span class="hljs-number">4267</span>-a97a-<span class="hljs-number">9754</span>cf7c528d app=kubeclarity scanner=dependency-trackINFO[<span class="hljs-number">0000</span>] Gathering packages for source sbom:nginx.sbom app=kubeclarity mode=local scanner=grypeINFO[<span class="hljs-number">0001</span>] Found <span class="hljs-number">136</span> vulnerabilities app=kubeclarity mode=local scanner=grypeINFO[<span class="hljs-number">0001</span>] Sending successful results app=kubeclarity mode=local scanner=grypeINFO[<span class="hljs-number">0001</span>] Got result for job <span class="hljs-string">"grype"</span> app=kubeclarityWARN[<span class="hljs-number">0001</span>] <span class="hljs-string">"dependency-track"</span> job failed: failed to create project: Put <span class="hljs-string">"https://dependency-track-apiserver.dependency-track/api/v1/project"</span>: dial tcp: lookup dependency-track-apiserver.dependency-track: no such host app=kubeclarityINFO[<span class="hljs-number">0001</span>] Merging result from <span class="hljs-string">"grype"</span> app=kubeclarityNAME INSTALLED FIXED-IN VULNERABILITY SEVERITY SCANNERS libcurl4 <span class="hljs-number">7</span>.<span class="hljs-number">74</span>.<span class="hljs-number">0</span>-<span class="hljs-number">1</span>.<span class="hljs-number">3</span>+deb11u7 CVE-<span class="hljs-number">2023</span>-<span class="hljs-number">23914</span> CRITICAL grype libdb5.<span class="hljs-number">3</span> <span class="hljs-number">5</span>.<span class="hljs-number">3</span>.<span class="hljs-number">28</span>+dfsg1-<span class="hljs-number">0</span>.<span class="hljs-number">8</span> CVE-<span class="hljs-number">2019</span>-<span class="hljs-number">8457</span> CRITICAL grype libcurl4 <span class="hljs-number">7</span>.<span class="hljs-number">74</span>.<span class="hljs-number">0</span>-<span class="hljs-number">1</span>.<span class="hljs-number">3</span>+deb11u7 CVE-<span class="hljs-number">2023</span>-<span class="hljs-number">27536</span> CRITICAL grype curl <span class="hljs-number">7</span>.<span class="hljs-number">74</span>.<span class="hljs-number">0</span>-<span class="hljs-number">1</span>.<span class="hljs-number">3</span>+deb11u7 CVE-<span class="hljs-number">2023</span>-<span class="hljs-number">27536</span> CRITICAL grype curl <span class="hljs-number">7</span>.<span class="hljs-number">74</span>.<span class="hljs-number">0</span>-<span class="hljs-number">1</span>.<span class="hljs-number">3</span>+deb11u7 CVE-<span class="hljs-number">2023</span>-<span class="hljs-number">23914</span> CRITICAL grype libcurl4 <span class="hljs-number">7</span>.<span class="hljs-number">74</span>.<span class="hljs-number">0</span>-<span class="hljs-number">1</span>.<span class="hljs-number">3</span>+deb11u7 CVE-<span class="hljs-number">2023</span>-<span class="hljs-number">27533</span> HIGH grype e2fsprogs <span class="hljs-number">1</span>.<span class="hljs-number">46</span>.<span class="hljs-number">2</span>-<span class="hljs-number">2</span> CVE-<span class="hljs-number">2022</span>-<span class="hljs-number">1304</span> HIGH grype ncurses-bin <span class="hljs-number">6</span>.<span class="hljs-number">2</span>+<span class="hljs-number">20201114</span>-<span class="hljs-number">2</span>+deb11u1 CVE-<span class="hljs-number">2023</span>-<span class="hljs-number">29491</span> HIGH grype curl <span class="hljs-number">7</span>.<span class="hljs-number">74</span>.<span class="hljs-number">0</span>-<span class="hljs-number">1</span>.<span class="hljs-number">3</span>+deb11u7 CVE-<span class="hljs-number">2022</span>-<span class="hljs-number">43551</span> HIGH grype bash <span class="hljs-number">5</span>.<span class="hljs-number">1</span>-<span class="hljs-number">2</span>+deb11u1 CVE-<span class="hljs-number">2022</span>-<span class="hljs-number">3715</span> HIGH grype perl-base <span class="hljs-number">5</span>.<span class="hljs-number">32</span>.<span class="hljs-number">1</span>-<span class="hljs-number">4</span>+deb11u2 CVE-<span class="hljs-number">2023</span>-<span class="hljs-number">31484</span> HIGH grype libgcrypt20 <span class="hljs-number">1</span>.<span class="hljs-number">8</span>.<span class="hljs-number">7</span>-<span class="hljs-number">6</span> CVE-<span class="hljs-number">2021</span>-<span class="hljs-number">33560</span> HIGH KubeClarity uses Grype and Dependency-Track as its default vulnerability scanners, but it offers the flexibility to incorporate additional scanners and run scans accordingly. This capability is a key strength of KubeClarity, as it enables the simultaneous execution of multiple scanners and consolidates their results. Let's take advantage of this feature, try it, and examine the results by throwing Trivy into the mix.
SCANNERS_LIST="grype trivy" kubeclarity-cli scan nginx.sbom --input-type sbomExample output
INFO[0000] Called trivy scanner on source sbom nginx.sbom  app=kubeclarity scanner=trivy
INFO[0000] Loading DB. update=true                       app=kubeclarity mode=local scanner=grype
INFO[0000] Need to update DB                             app=kubeclarity scanner=trivy
INFO[0000] DB Repository: ghcr.io/aquasecurity/trivy-db  app=kubeclarity scanner=trivy
INFO[0000] Downloading DB...                             app=kubeclarity scanner=trivy
INFO[0010] Gathering packages for source sbom:nginx.sbom  app=kubeclarity mode=local scanner=grype
INFO[0010] Found 136 vulnerabilities                     app=kubeclarity mode=local scanner=grype
INFO[0011] Sending successful results                    app=kubeclarity mode=local scanner=grype
INFO[0011] Got result for job "grype"                    app=kubeclarity
INFO[0012] Vulnerability scanning is enabled             app=kubeclarity scanner=trivy
INFO[0012] Detected SBOM format: cyclonedx-json          app=kubeclarity scanner=trivy
INFO[0012] Detected OS: debian                           app=kubeclarity scanner=trivy
INFO[0012] Detecting Debian vulnerabilities...           app=kubeclarity scanner=trivy
INFO[0012] Number of language-specific files: 1          app=kubeclarity scanner=trivy
INFO[0012] Detecting jar vulnerabilities...              app=kubeclarity scanner=trivy
INFO[0012] Sending successful results                    app=kubeclarity scanner=trivy
INFO[0012] Found 136 vulnerabilities                     app=kubeclarity scanner=trivy
INFO[0012] Got result for job "trivy"                    app=kubeclarity
INFO[0012] Merging result from "grype"                   app=kubeclarity
INFO[0012] Merging result from "trivy"                   app=kubeclarity
NAME              INSTALLED                FIXED-IN  VULNERABILITY     SEVERITY    SCANNERS
curl              7.74.0-1.3+deb11u7                 CVE-2023-23914    CRITICAL    grype(*), trivy(*)
curl              7.74.0-1.3+deb11u7                 CVE-2023-27536    CRITICAL    grype(*), trivy(*)
libcurl4          7.74.0-1.3+deb11u7                 CVE-2023-27536    CRITICAL    grype(*), trivy(*)
libdb5.3          5.3.28+dfsg1-0.8                   CVE-2019-8457     CRITICAL    grype(*), trivy(*)
libcurl4          7.74.0-1.3+deb11u7                 CVE-2023-23914    CRITICAL    grype(*), trivy(*)
perl-base         5.32.1-4+deb11u2                   CVE-2023-31484    HIGH        grype(*), trivy(*)
libss2            1.46.2-2                           CVE-2022-1304     HIGH        grype(*), trivy(*)
bash              5.1-2+deb11u1                      CVE-2022-3715     HIGH        grype(*), trivy(*)
You can check out the README to learn more options on exporting the scan results to a KubeClarity backend and browse the vulnerabilities in a user-friendly dashboard.
Analyzing vulnerability scan results
As you might have noticed, the KubeClarity UI and CLI options provide comprehensive vulnerability scan results. These results highlight the identified vulnerabilities and their severity levels and offer remediation suggestions. Use the UI or CLI commands to access and analyze the scan results to effectively prioritize and address the detected vulnerabilities.
The following Figure-10 illustrates how KubeClarity organizes the resulting data from a scan. It allows you to follow the findings by drilling down from the top down or bottom up.
Bottoms-up navigation
Given a vulnerability, what package does it belong to? Which application resources are relevant to that package, and finally, which applications are they part of.
Top-down navigation
Given an application, could you show me all its resources, packages, and vulnerabilities?

Making the most of your vulnerability scanning tools
By leveraging KubeClarity's vulnerability scanning capabilities, you can enhance the security of your Kubernetes clusters and significantly reduce the vulnerability bloat by focusing on the vulnerabilities that matter the most. Whether utilizing the user interface (UI) or the command-line interface (CLI), KubeClarity empowers you to proactively identify and mitigate potential security risks within your Kubernetes environments. You can leverage vulnerability scanning with KubeClarity today and improve your security posture.
Learn more about KubeClarity
We’ve been covering a variety of topics related to KubeClarity and software supply chain security. Learn more here.
Pallavi Kalapatapu is a Principal Engineer and open-source advocate at Outshift, formerly known as Cisco’s Emerging Technology & Incubation organization.

Get emerging insights on emerging technology straight to your inbox.
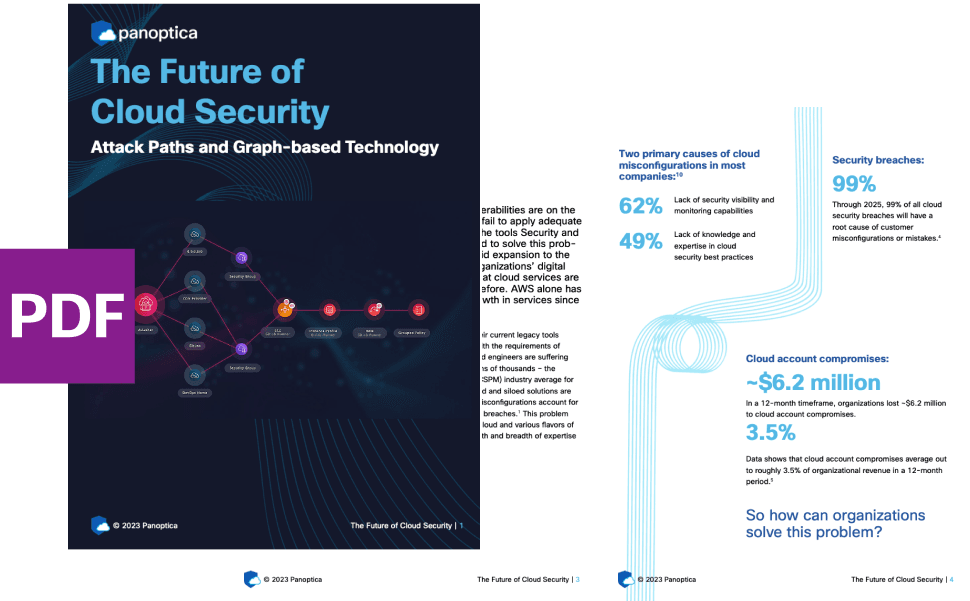
Unlocking Multi-Cloud Security: Panoptica's Graph-Based Approach
Discover why security teams rely on Panoptica's graph-based technology to navigate and prioritize risks across multi-cloud landscapes, enhancing accuracy and resilience in safeguarding diverse ecosystems.


The Shift keeps you at the forefront of cloud native modern applications, application security, generative AI, quantum computing, and other groundbreaking innovations that are shaping the future of technology.